Deploy with Deta
Learn to self-host an RSSerpent instance on Deta (for free) through this tutorial.
Access Token
In order to deploy on Deta, you need to create an account at https://web.deta.sh first.
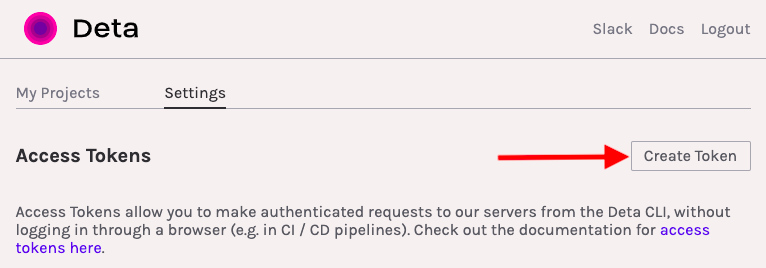
After successful registration & sign-in, you will need to create an access token so that RSSerpent could help you do the rest!
-
Go to your home page
https://web.deta.sh/home/{username}/; -
Click the Settings tab, then click the Create Token button;

-
Copy the generated access token to your clipboard.
Read Deta's document if you have any question/concern about the access token.
Use the Template
RSSerpent provides a Deta deployment template. You will need an GitHub account before continuing.
- Go to the template on GitHub;
- Click the
 button.
You will be prompted to create a repository based on the template. After successful creation:
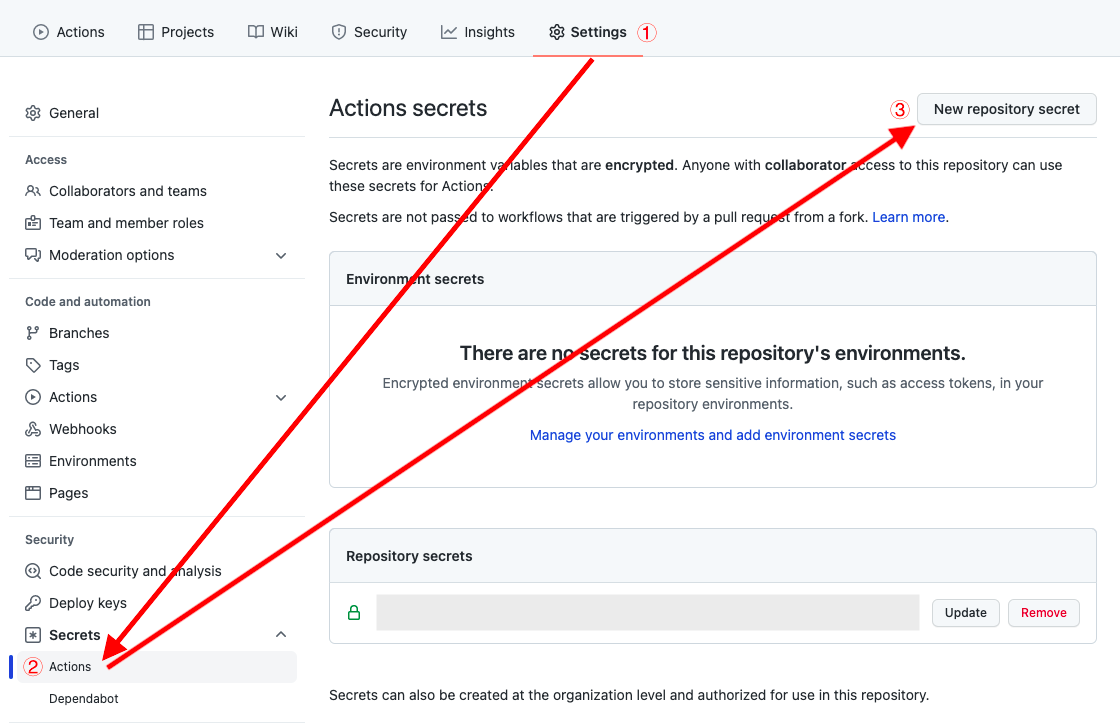
- Go to your repository's Settings tab;
- Go to the Secrets section, click the New repository secret button;
-
Create a secret whose name is
DETA_TOKENand whose value is the Deta access token you just created.
GitHub will need the access token so that it could automatically deploy your RSSerpent instance on Deta.
Running 🎉
-
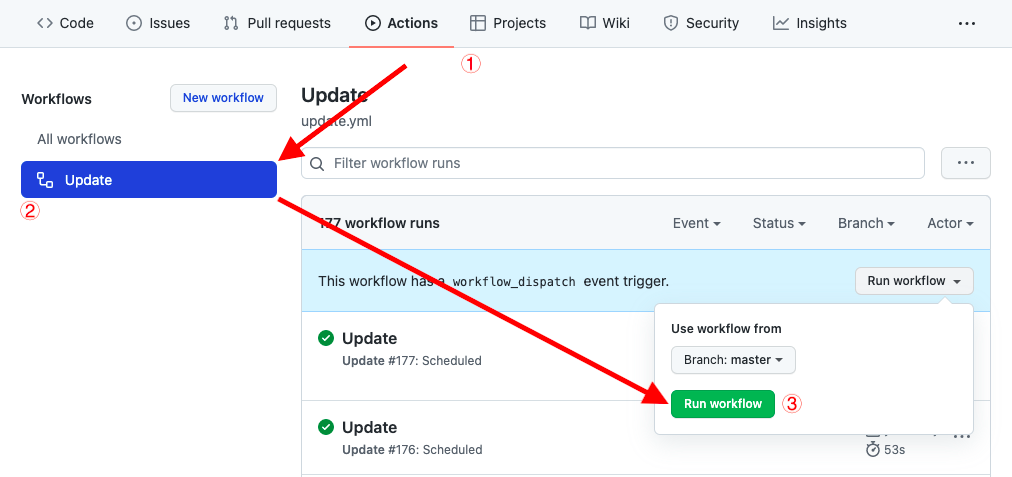
In your repository's Actions tab, locate the Update workflow, click the Run workflow button to manually trigger the first deployment;

-
Go to your deta.sh home page, under the default project's Micros list, select rsserpent, you will see the URL of your instance (usually https://xxxxxx.deta.dev/) at the top-right corner.
Open that URL in your browser. If you see the "Welcome to RSSerpent!" message, congratulations, you are good to go!
Miscellany
If you wish to add RSSerpent plugins, read [Install Plugins].
If you need a custom domain, read Deta's document.